How to Do a Goblet Squat: Step-by-Step Form

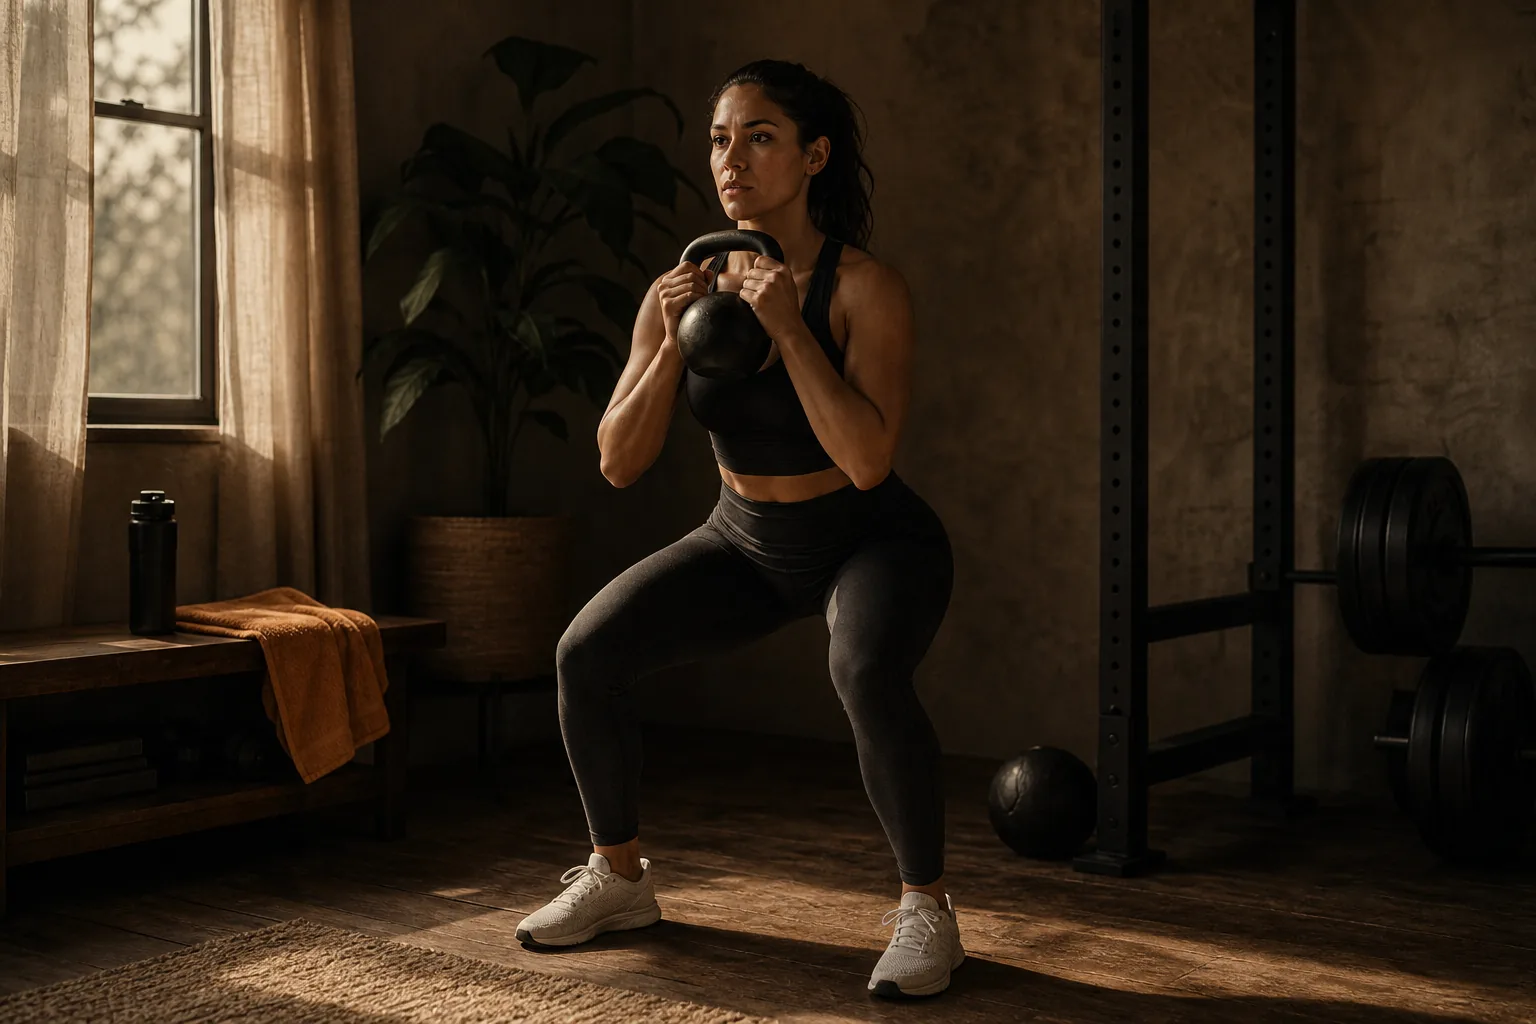
If you want to learn how to do a goblet squat, start with a light weight and a stance that feels steady. Then follow these five steps to squat with control, find a repeatable depth, and build consistent reps at home.
Step 1: Choose a Weight and Set Up Your Stance
Start with a weight you can hold close to your chest without leaning back or letting your arms tire first. A kettlebell works well. So does a dumbbell held upright, with both hands supporting one end.
To pick up the weight, stand over it and bend at your hips and knees. Keep your back long as you lift it. Bring it to your chest before you stand fully. Don’t curl a weight from the floor if you can’t control that lift.
Hold the kettlebell by its horns, the sides of its handle, or support its body with both hands. Keep your elbows close to your ribs. Hold the weight vertically at chest height. That gives you a clear setup cue.
Stand with your feet around hip to shoulder width. Turn your toes out a little if that lets your knees move comfortably. There isn’t one stance that fits every body. Try a few slow bodyweight squats and keep the position where your feet stay planted.
Think of each foot as a tripod. Keep the heel, the base of your big toe, and the base of your little toe in contact with the floor. You should feel steady across the whole foot, not tipped toward your toes or rocking back onto your heels.
If you're building a home routine around this move, the home strength training plan for women can help you place it in a weekly schedule. Pick a weight that lets you keep the same stance and grip for every rep.
Step 2: Brace Your Core and Begin the Descent
Before each rep, breathe in and tighten your middle as if you're preparing for a gentle bump to the stomach. Keep the brace firm enough to hold your trunk steady, but don’t tense your whole body so hard that you can’t move.
Keep the weight close to your chest. If it drifts forward, your arms and upper back have to work harder to hold it there, and your chest may tip down. Let your shoulders sit naturally. Keep your neck relaxed and your gaze ahead or slightly down.
Start the descent by bending your knees and hips together. Think “sit between your hips,” rather than pushing your hips far behind you like a deadlift. Let your knees travel in the same general direction as your toes.
Your knees can move past your toes. That’s not automatically a form mistake. Keep your whole foot down and make sure the movement feels controlled. Forcing your knees to stay behind your toes can shift the movement and make it harder to find a comfortable squat.
Lower at a pace you can manage. Don’t drop quickly and hope to catch yourself at the bottom. Keep the weight near your sternum and your trunk supported as your hips move down.
A simple coaching cue is to brace, then sit your hips down between your knees. Use that idea without forcing a pose. Your torso may lean forward a little, and that’s normal if your back stays controlled.
If your feet shift or your chest collapses, pause. Reduce the weight or shorten the range, then try again with a slower descent.
Step 3: Squat to a Comfortable Depth
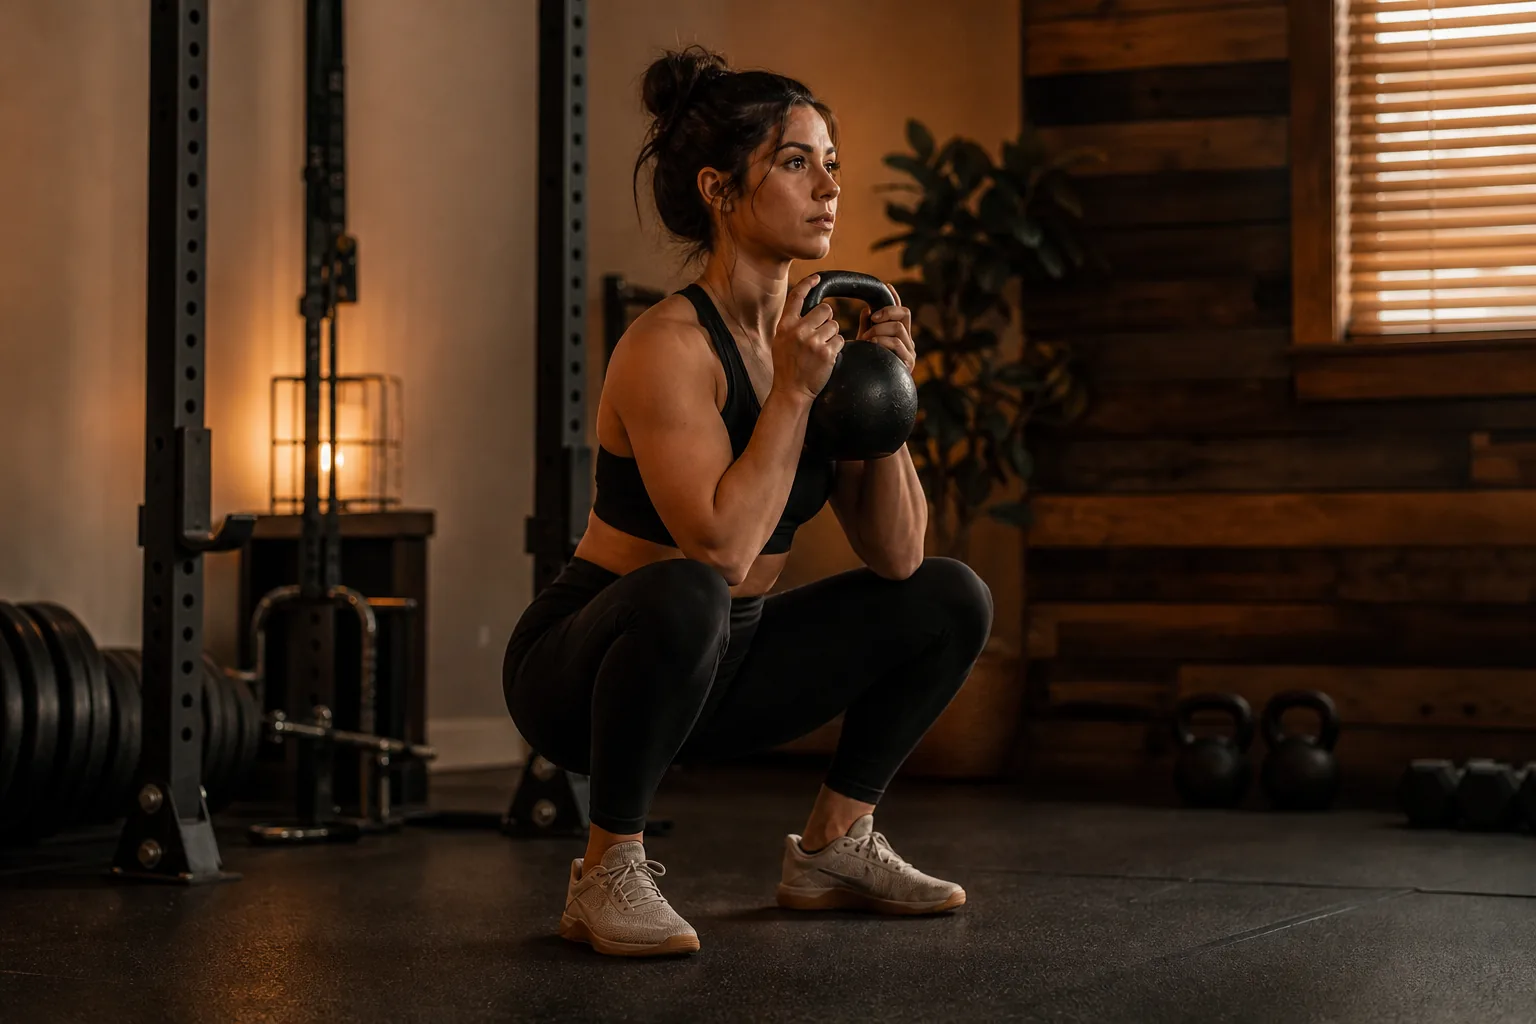
Your best depth is the deepest point you can reach while keeping your feet steady and your trunk controlled. Thighs parallel to the floor can be a useful reference, but it isn’t a rule you need to force on every rep.
As you lower, watch for three changes: a heel lifting, a knee dropping inward, or your lower back rounding more than you can control. Stop just before one of those changes. That’s your current working depth.
The goblet hold can make it easier to stay upright because the weight sits in front of you. It won’t change how far your ankles or hips can bend. If the weight shifts you forward, bring it closer to your chest. If your heels lift, try a slightly wider stance or a little more toe turnout.
At the bottom, keep some tension in your legs and trunk. Don’t relax into the position or bounce out of it. A brief pause can help you check that your feet are still grounded and your knees still follow your toes.
You don’t need your elbows to touch your knees. That cue works for some people, but it isn’t the goal. Don’t push your knees outward past the line of your feet just to make room for your elbows.
For more lower-body moves to use alongside this squat, see these kettlebell leg workouts for strength. For this rep, use the depth you can repeat without losing balance or changing your back position.
Step 4: Push Through Your Feet to Stand
From the bottom, press the floor away through your whole foot. Let your hips and shoulders rise together. Your knees should straighten along the same path they followed on the way down.
Keep the weight close as you stand. If your hips shoot up before your chest, the rep may turn into a forward fold. Slow down and use a lighter weight if you can’t keep your trunk and hips rising together.
Breathe out as you pass the hardest part of the lift. You don’t have to force a loud exhale. A steady breath can help you keep the brace without holding it longer than needed.
At the top, stand tall with your ribs over your hips. Let your knees and hips straighten, then pause long enough to reset your breath. Don’t lean backward or shove your hips forward to finish the rep.
Keep an eye on your knees as you rise. If they cave inward, think about keeping them in line with your toes while you press the floor away. A cue to push the knees outward against the elbows can help some lifters, but don’t force contact or push past a comfortable knee path.
One rep is complete when you’re standing in a balanced position with the weight still close. Take a breath before the next one. If your balance has shifted, reset your feet instead of rushing on.
For a home session, pair the squat with a different movement only after you can repeat this stand-up pattern without losing control. A clean rep matters more than finishing a circuit quickly.
Step 5: Check Your Form and Build Consistent Reps
Use a few simple checks between sets. Are your heels staying down? Do your knees follow your toes? Does the weight stay close to your chest? If one answer is no, change one thing at a time. Try less weight or a shallower depth before changing everything at once.
A side-view phone video can help you spot a sudden change in depth or a rounded lower back. A front-quarter view can show whether your knees drift inward. Treat video as feedback, not a diagnosis. Your body doesn’t need to match a perfect-looking silhouette to do a controlled rep.
When you’re learning the movement, stop the set while you can still keep the same form. Sets of 8 to 12 reps are a common way to practice the squat. Use a lower count if your balance, depth, or speed starts to change.
Once you can complete your reps with steady form, write down the weight and number of reps. Add reps before adding load. When you reach the top of your chosen rep range without losing control, try the next small increase in weight and return to fewer reps.
Hybrid Fit Mom’s six-week kettlebell strength and conditioning program gives you a planned structure for home training, with four sessions a week, recorded exercise demonstrations, and an eating framework. The program’s six-week training plan also uses a simple weight check: choose a weight you could deadlift for ten clean reps. Mari Grossi is a weightlifting L1 certified coach, a teacher, and a mom of two. The plan can help when saved workout clips leave you guessing what to do next.
If goblet squats cause sharp or worsening pain, stop and seek advice from a qualified health professional. You can also choose a bodyweight squat or reduce the range while you work on control. The goal is repeatable training that fits your life, not a forced depth or a heavier bell.
For another perspective on building glute strength at home, this guide to glute-strengthening exercises covers additional movements with form cues and starter sets. Keep your squat practice focused, then add other work when you have a reason and time for it.
Goblet Squat FAQ
How heavy should a goblet squat weight be?
Choose a weight you can hold close to your chest while keeping your feet planted and your torso controlled. Start with bodyweight if you’re still learning the pattern. Hybrid Fit Mom’s weight check is to pick a load you could deadlift for ten clean reps. If your arms tire before your legs, choose a lighter weight.
How low should I squat in a goblet squat?
Squat as low as you can while keeping your feet down, knees controlled, and back supported. Your thighs don’t have to reach parallel on every rep. Stop above the point where your heels lift or your posture changes. With practice, your comfortable depth may change, but don’t force it.
Should my knees go past my toes?
Yes, your knees can move past your toes if your feet stay planted and the movement feels comfortable. Let your knees follow the direction of your toes. Don’t force them to stay behind your toes, and don’t let them suddenly collapse inward as you lower or stand.
How many goblet squats should I do?
A useful starting point is a few controlled sets in the 8 to 12 rep range. Use fewer reps if your form changes before you reach that count. Once you can repeat the same depth and pace, build reps first, then consider a small increase in load.
Conclusion
Start with a weight you can hold securely, then practice each rep at a depth you can control. If you want a week-by-week plan rather than a stack of saved clips, explore Hybrid Fit Mom’s six-week program and choose your next workout around the time you actually have.