How to Do a Kettlebell Swing: Step-by-Step Form

A kettlebell swing should feel like a sharp hip snap, not a tug on your lower back. Set your stance, hinge with control, then let your hips send the bell forward. If you’re fitting training around work and family, a few sound reps beat a rushed set every time.
Step 1: Choose a Kettlebell and Set Your Stance
To learn how to do a kettlebell swing, start with a load you can control while keeping your back steady. The bell should feel heavy enough that your hips need to drive it, but not so heavy that you lose your hinge or grip.
If you’re new to swings, first practice the motion without weight. Then test a light-to-moderate bell for a few controlled reps. You should be able to set it down without dropping it, and your arms shouldn’t have to lift it to chest height. If the bell barely moves when you snap your hips, it may be too heavy. If your shoulders do most of the work, it may be too light.
Starting-weight charts can’t account for your training history, grip, or current strength. The useful test is how the bell moves in your hands. Keep the first practice load conservative, especially if the hinge itself is new.
Make a stable base
Stand with your feet about shoulder-width apart. Point your toes straight ahead or turn them out just a little, whichever lets your knees track comfortably. Keep your whole foot on the floor. Don’t rock onto your toes when the bell swings forward.
Place the bell a short step in front of you, between your feet. You should have room to reach its handle without rounding your back. Pick it up as you would a deadlift: send your hips back, bend your knees enough to reach the handle, brace, then stand tall.
Use a flat, firm surface and clear the space around you. Avoid training near a wall, a table, or a child’s play area. The bell moves behind your legs on each rep, and you need room to control it at the end of your set.
- Plant your feet and keep them still.
- Choose a bell you can control through the full swing.
- Put the handle within reach without folding your back.
Check before you start: You should feel balanced across your feet, with a small bend in your knees and enough space to hinge.
Step 2: Learn the Hip Hinge and Brace Your Spine
A kettlebell swing is a hip-hinge movement, not a squat. Your hips travel back, your torso tips forward, and your knees bend only enough to let the bell pass.
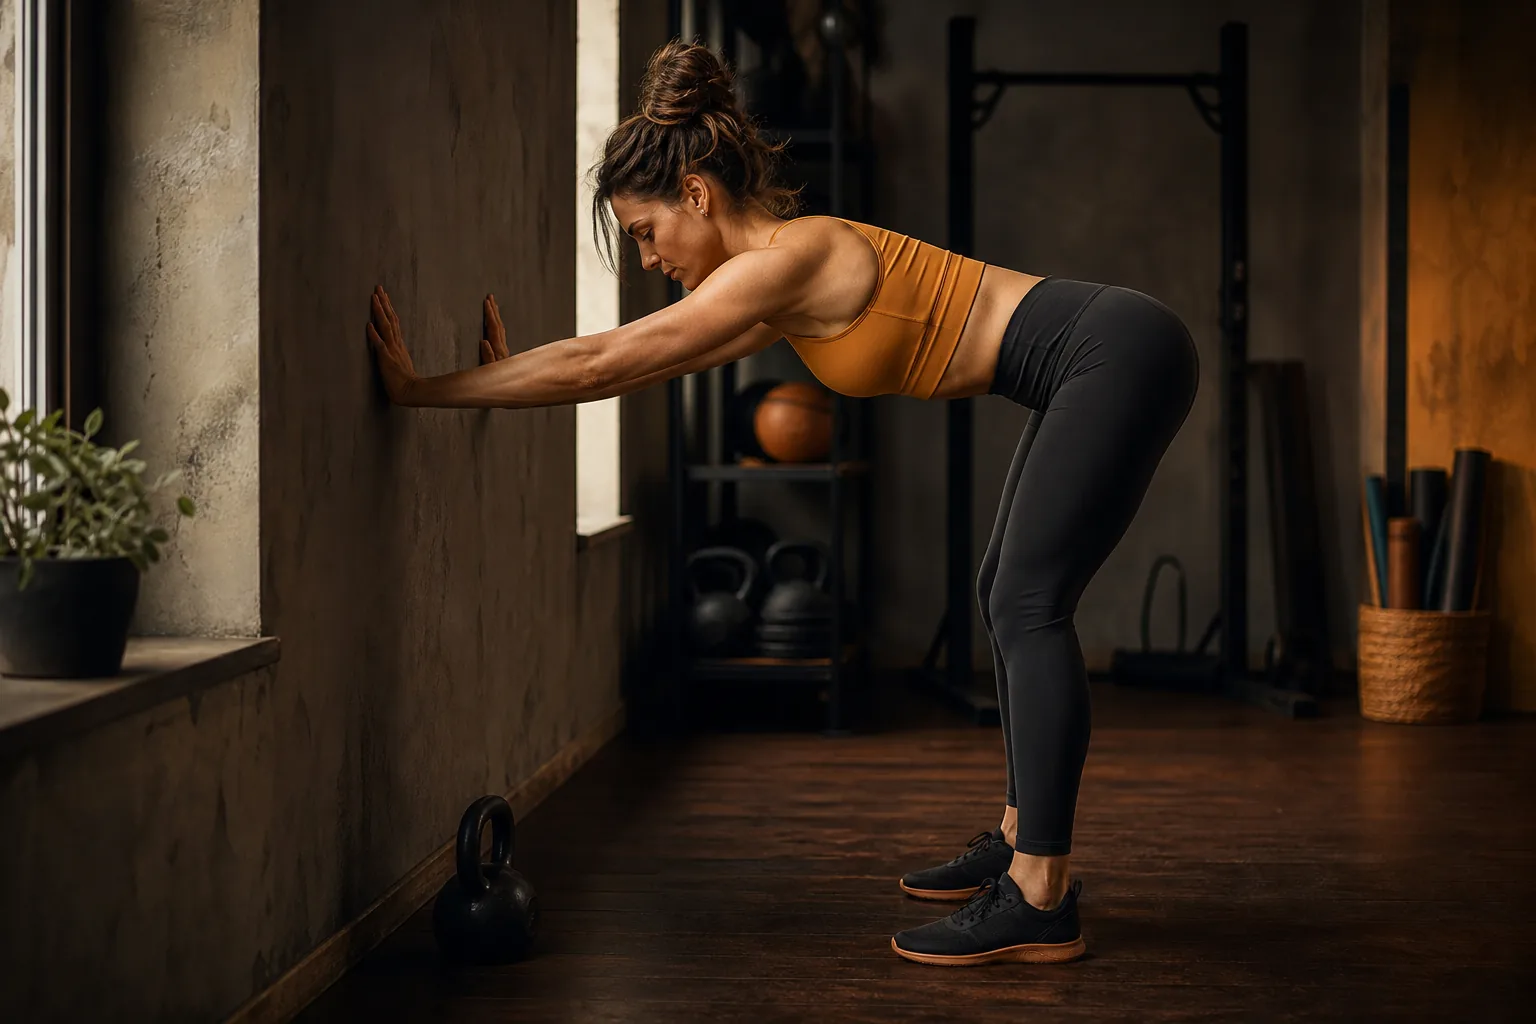
Practice the hinge before you pick up the bell. Stand with your back to a wall, about a foot away. Soften your knees, then push your hips back until your glutes touch the wall. Keep your ribs stacked over your pelvis. Stand by pressing your feet into the floor and bringing your hips forward.
Try several slow reps. If your knees move forward a lot and your hips drop straight down, you’re squatting. If your back rounds to reach the wall, move closer and shorten the hinge. The goal is a smooth fold at the hips, not the deepest position you can reach.
Keep your spine steady
Think of your spine as one long line from the back of your head to your tailbone. Keep its natural shape. Don’t round your lower back to reach farther, and don’t lift your chin to watch the bell. Pick a spot on the floor a few feet ahead and let your eyes stay there.
Before each hinge, take a breath into your belly and sides. Tighten your middle as if you’re preparing for a gentle bump. This brace should feel firm, not like you’re sucking in your stomach. Keep breathing through the set instead of holding your breath for several reps.
A tactile check can help. Stand a few inches in front of a wall or foam roller placed behind you. Hinge until your hips tap it. If your knees bend so much that you sit down toward the floor, reset and send your hips farther back. The object gives you a clear target; it doesn’t need to touch your lower back.
Use a pain-free range. If you have a current back injury, ongoing pain, or a health concern that affects exercise, get advice from a qualified health professional before adding ballistic swings. Stop if you feel sharp pain, numbness, or symptoms that worsen as you move.
By now you should have: a hinge you can repeat without rounding your back or turning it into a squat.
Step 3: Hike the Bell Back and Engage Your Lats
The first rep starts with a hike, not an arm curl. You pull the bell back between your thighs, then use the hip drive to start its forward path.
Set the bell on the floor a short step ahead. Hinge back, soften your knees, and take the handle with both hands. Keep your shoulders away from your ears. Draw your upper arms lightly toward your ribs, as if you were closing your armpits. That tension wakes up your lats, the broad muscles along your back, and helps keep the bell from pulling your shoulders forward.
Tilt the bell slightly toward you so the handle sits ready to move. Brace your middle. Then hike the bell back high between your legs, as if passing a football. The forearms should come close to your inner thighs. Keep your wrists straight and your arms long.
Don’t let the bell drop low between your knees. A low, loose backswing can pull your shoulders forward and make the next hip drive feel weak. At the same time, don’t force the bell so high that your shoulders twist. Find the path that lets your torso stay firm and your hips load behind you.
Use your hands without squeezing too hard
Hold the handle firmly enough to keep control, but don’t crush it with every finger. A relaxed, secure grip can reduce needless tension in your wrists and forearms. Your hands guide the bell; they don’t lift it to the top.
On each backswing, feel your hamstrings lengthen as your hips move back. Keep your shins close to vertical. If your knees shoot forward, the movement is drifting toward a squat. If they lock straight, you may be hinging too stiffly to load your hips well.
Practice the hike and reset without chasing a high swing. Do two or three single reps, setting the bell down between each one. Check your feet, brace, and hinge again before you start. That pause lets you learn the setup rather than relying on momentum to hide a rushed first rep.
If a visual cue helps, you can watch Mari's free swing-to-clean demo alongside written cues. Keep your focus on the positions you can control: a steady back, close forearms, and a bell that travels between your legs.
The bell should feel loaded at the back of the hinge, like a spring ready to release. If it feels like a heavy pull on your arms, stop and reset your grip and stance.
Step 4: Drive Through Your Hips to Swing the Bell
Once the bell is hiking cleanly, drive your hips forward to send it up. Your glutes and hamstrings create the force. Your arms stay long and guide the bell as it floats.
From the backswing, press your feet into the floor and snap your hips forward. Stand tall, squeeze your glutes, and bring your ribs over your pelvis. Don’t lean back at the top. The finish is a strong standing plank, not a backbend.
Let the bell rise on its own to about chest height. You don’t need to lift it with your shoulders. Keep your hands on the handle while your arms stay relaxed enough for the bell to move freely. If you’re muscling it upward, lower the load or return to hinge practice.
As the bell falls, stay tall for a moment. Then let it travel back toward you. Hinge only when the bell is close enough to pass between your legs. That timing matters: folding too early can pull you forward, while waiting too long can leave you standing as the bell reaches your thighs.
Link the two positions
Think of the swing as a quick switch between two shapes:
- Hinge: hips back, knees soft, torso tipped forward, spine steady.
- Stand: hips forward, glutes firm, ribs stacked, body tall.
The bell passes through the hinge, then floats in front of you as you stand. It shouldn’t travel in a big circle around your shoulders. Keep it close to your body on the way back, then let the hip snap send it forward.
Start with a few reps and stop before your form fades. At the end of the set, let the bell swing back between your legs, then guide it to the floor from your hinge. Don’t try to park it while standing upright with your arms stretched forward.
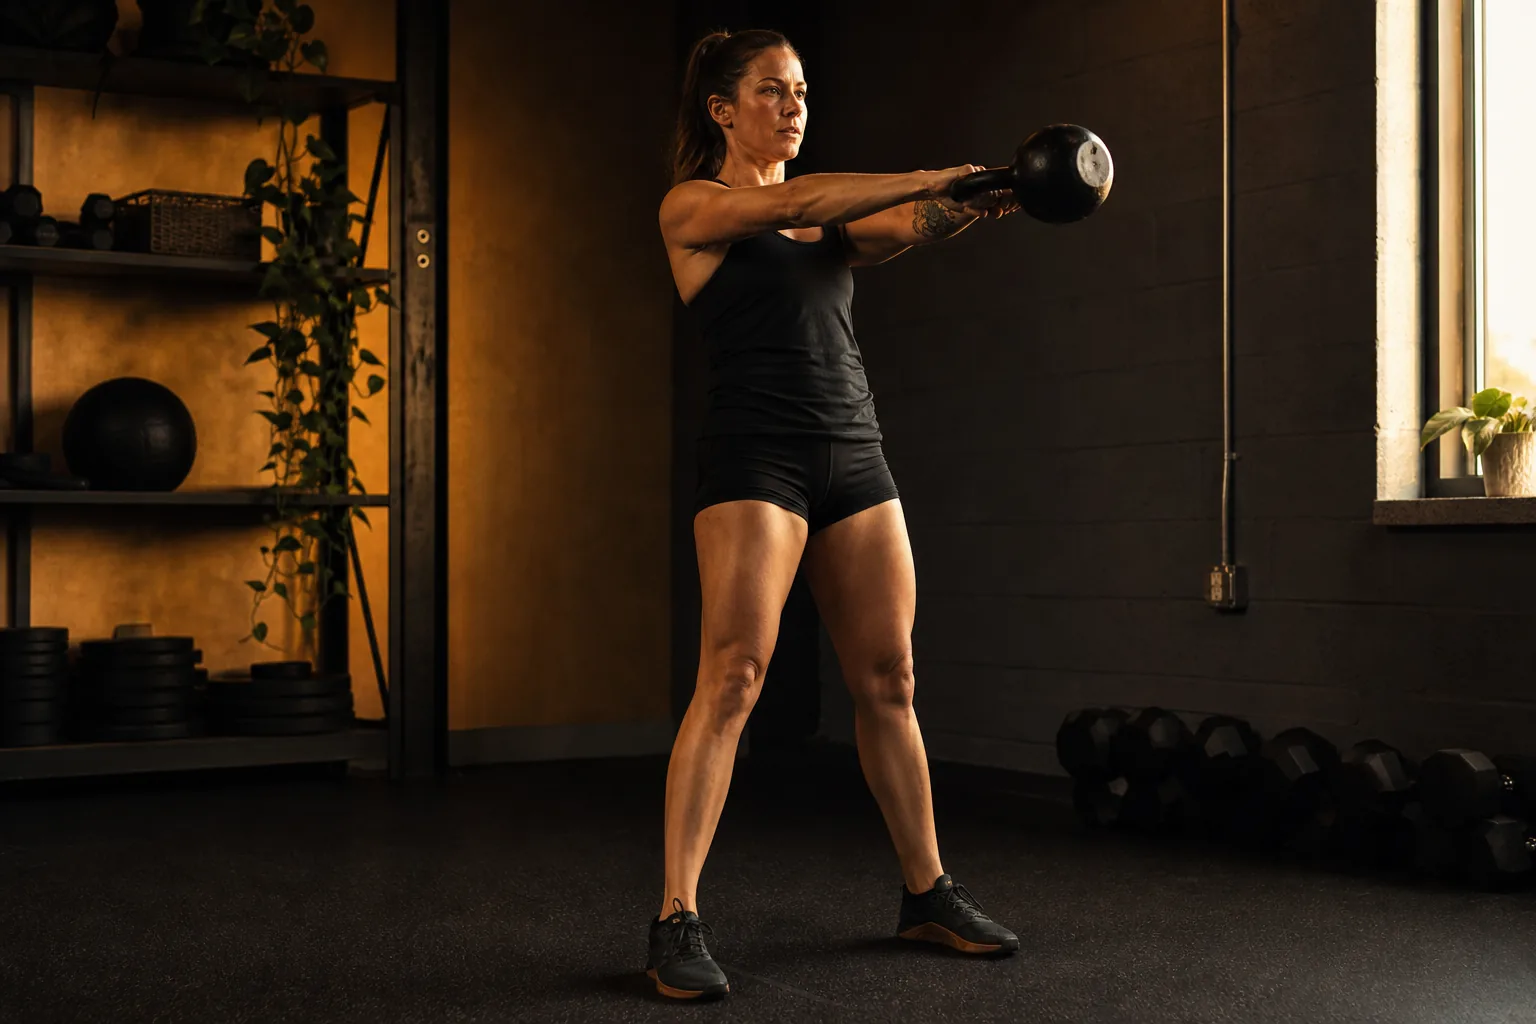
By now you should have: a controlled backswing, a crisp hip drive, and a tall finish without leaning back.
Step 5: Coordinate Your Breathing and Fix Common Form Mistakes
Breathing gives your swing a rhythm. Inhale as the bell returns between your legs, then exhale as you snap your hips forward. Keep your middle braced through both parts of the rep.
You don’t need a huge breath. Take in enough air to brace before the hinge, then breathe out firmly as you stand. As the bell falls, breathe in again. If you’re gasping or holding your breath for a long set, pause and rest before your form slips.
Fix the mistakes that change the movement
- Your back rounds. Reduce the range or use a lighter bell. Rehearse the wall hinge, then restart with a firm brace.
- Your knees bend too much. Send your hips back instead of dropping straight down. Keep the shins near vertical through the backswing.
- Your arms lift the bell. Make the hip snap sharper and let the bell float. If it won’t rise without an arm pull, review your hinge and load.
- You lean back at the top. Finish tall with your ribs above your hips. Squeeze your glutes without pushing your stomach forward.
- The swing stays shallow. Let the bell travel back far enough to load your hamstrings. Keep it close, and hinge when it approaches your body.
- The bell swings too low. Bring it back between your thighs rather than letting it hang near your knees. Keep your arms close to your sides.
- You look up and down. Choose a steady point ahead and keep your neck in line with your spine.
A small amount of knee bend is normal. The problem is when the knees and hips both drop like a squat, or when you try to keep the knees locked. Let the hips do most of the travel, with the knees soft enough to support the hinge.
Watch the return of the bell, too. Don’t let it yank your shoulders forward or lift your heels. Keep your feet planted and your grip secure. If the bell pulls you out of position, end the set and reset with less weight or fewer reps.
Form often fades before you notice you’re tired. End the set when your back starts to round, your arms take over, or your breath becomes erratic. Rest, then decide whether to repeat the same number of reps or stop for the day.
For a safe swing, the goal isn’t to force every rep through discomfort. If pain changes your movement, stop. If it persists, seek care from a qualified clinician rather than trying to solve it by pushing harder.
Step 6: Choose a Swing Style and Build Your Practice
For most people learning the swing, the Russian style is the best place to begin. The bell rises to about chest or shoulder height, then returns through the hinge. The American swing travels overhead, which asks for more shoulder range and control.
Learn the Russian swing first. It gives you a clear target and keeps the movement focused on the hip drive. The overhead version isn’t a required upgrade. If your shoulders feel tight or you can’t keep your ribs stacked overhead, stay with the Russian swing.
Learn the hinge first and stop when your form breaks down. That’s a useful rule for practice, whatever style you choose.
Build skill before you build volume
Start with three sets of five clean reps, resting until you can breathe normally and focus again. If every rep looks and feels the same, add a few reps in a later session. You can also use a simple beginner format of three sets of ten, with a minute or two of rest between sets, as long as the bell stays under control.
Train swings two or three times a week at first, with a rest day between sessions. Treat this as a starting plan, not a rule for everyone. A short practice on a busy week still counts if you keep the reps crisp. Don’t add reps just to match a calendar.
Progress one thing at a time. First make the hinge more consistent. Then add a few reps. Only raise the bell’s weight once you can keep your posture and timing through every set. If the heavier bell makes the movement turn into an arm lift or a squat, go back to the previous load.
The right load depends on your strength and skill, not on what another person uses. A common starting point for women is around 8 kilograms, but that’s a starting reference, not a test you need to pass. Choose a bell that lets you move it with your hips while staying in control. If you can’t keep good form, reduce the weight or practice without a bell.
Fit the work into a week
For example, you might practice on Monday and Thursday after a short warm-up. Do your sets, note the load and reps, then leave the bell alone for the rest of the day. If you already do strength training, place swings early in a session while you’re fresh, or use them as a short conditioning block after your main lifts.
Swings can make your breathing rate rise because they use a large amount of muscle and move the bell fast. That can make them useful for conditioning, but it doesn’t mean every set should feel like a sprint. Keep the reps low enough to protect your form. For longer endurance work, use a plan that builds volume over time rather than jumping straight into long, timed sets.
Hybrid Fit Mom’s self-guided six-week kettlebell strength and conditioning program gives busy women a set weekly progression, prerecorded demonstrations, and an eating framework. It’s a one-time purchase with lifetime access to future programs. Mari demonstrates the movements, while the format leaves you to train at your own pace; there’s no live coaching. That structure may suit you if saved workouts haven’t turned into a steady routine.
Some people prefer direct check-ins and reminders. Others want to train on their own schedule without an ongoing subscription. Choose the kind of support you’ll actually use. In either case, write down your bell, sets, reps, and any form cue that helped. That small note makes it easier to pick up where you left off on a crowded week.
Frequently Asked Questions
How many kettlebell swings should a beginner do?
A beginner can start with three sets of five to ten controlled swings. Rest until your breathing settles and you can focus on your hinge again. Use fewer reps if your back rounds, your arms take over, or the bell starts to pull you forward. Add reps only after each set stays smooth.
What weight kettlebell should I use for swings?
Use a bell that feels heavy enough to move with your hips, but light enough to control through every rep. A common beginner reference for women is about 8 kilograms, though your training background and skill matter more than the number. If you need to lift with your arms or lose your posture, choose a lighter load.
Should a kettlebell swing work your lower back?
You may feel your back muscles helping you hold a steady torso, but the swing shouldn’t feel like a strain in your lower back. The main drive comes from your hips, glutes, and hamstrings. If your back hurts, stop and check your hinge, load, and timing. Persistent or sharp pain calls for professional advice.
What’s the difference between Russian and American kettlebell swings?
A Russian swing stops around chest or shoulder height. An American swing continues overhead. The Russian style is a good choice while you learn the hinge and hip drive. The overhead version needs enough shoulder motion to reach overhead while keeping your ribs and back steady, so don’t switch styles just to make the swing higher.
How often should I practice kettlebell swings?
Two or three sessions a week is a reasonable starting point if you recover well and keep your reps clean. Leave a rest day between sessions at first. You can begin with a small number of reps and build slowly. If you’re sore, tired, or losing form, take more rest instead of forcing another set.
Conclusion
Keep the swing simple: hinge, brace, hike, then drive through your hips. Practice a few clean reps before adding weight or volume. If you want a structured home plan to help you keep going, explore Hybrid Fit Mom’s six-week kettlebell program and choose a pace that fits your week.